Objective
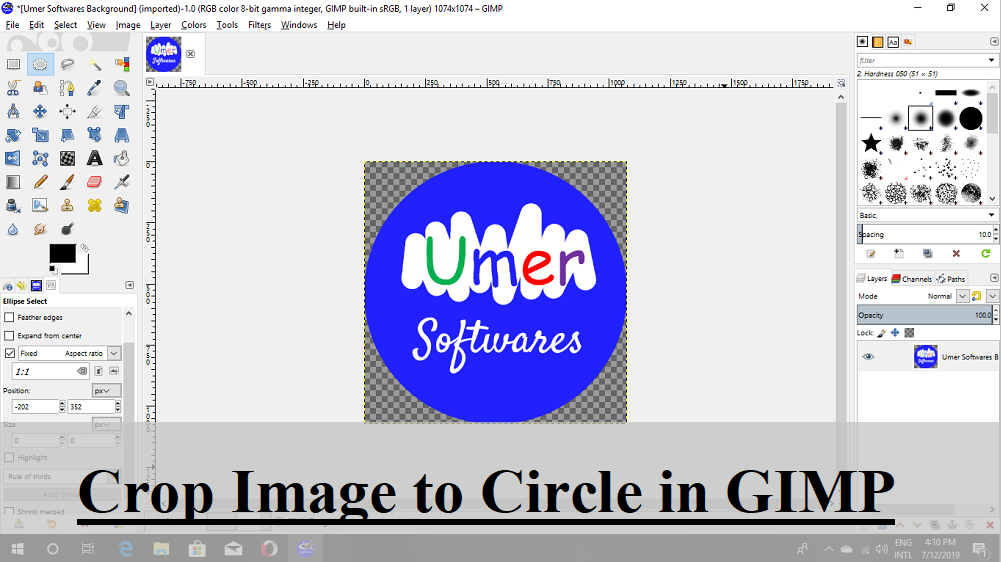
GIMP is a free, open source and easy to use image editing tool. In this post you will learn how to crop an image to a circle using GIMP.
Procedure
Open the Image
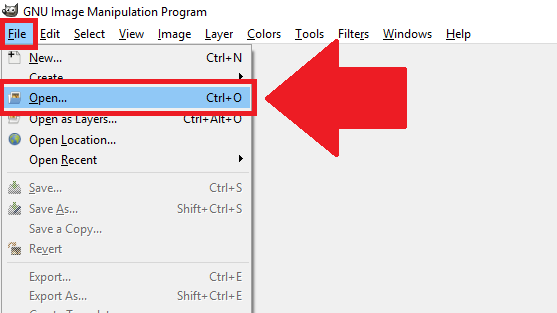
Use File > Open or press Ctrl + O to open the image in GIMP. I am using one of my pictures as a sample.
Set up Transparency
You may skip this step but this is required if you want to put the circular image on other images. It will make everything except the circle in your image transparent.
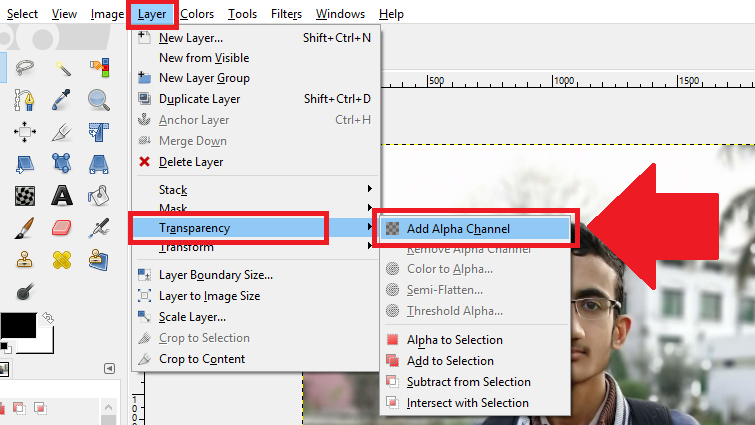
Go to Layer menu and select Transparency > Add Alpha Channel. If it is already greyed out, it means that your image already has transparency.
Set up Ellipse Select Tool
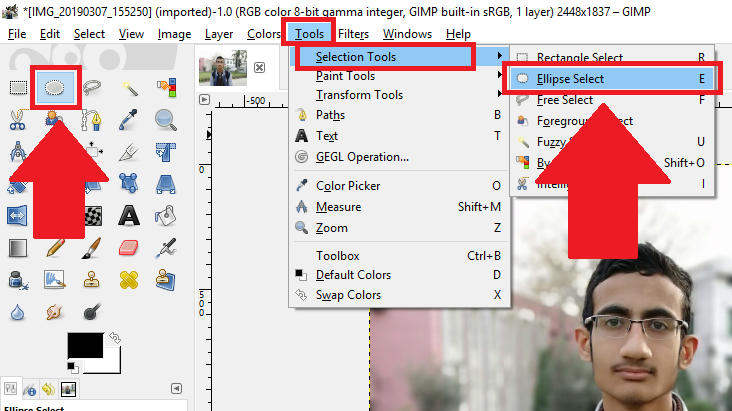
1. Select the Ellipse Select Tool from the left toolbar or go to Tools > Selection Tools > Ellipse Select
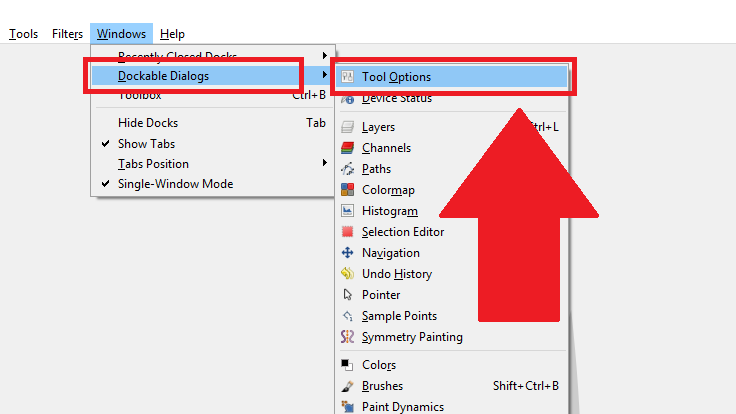
2. Open the Tool Options by selecting Windows > Dockable Dialogs > Tools Options
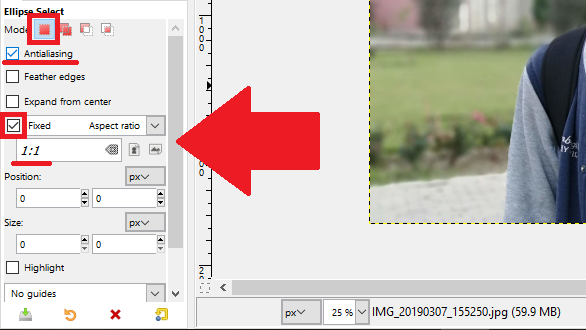
3. In the Tool Options, select the first option in Mode which is “Replace Current Selection”. Check the Antialising box. It will make the edges of the circle better. Set the Aspect Ratio to 1:1 by checking the Fixed Aspect Ratio Box and setting the Aspect ratio to 1:1. Setting the aspect ratio to 1:1 is required only if you want the image to be a circle. If you want the image to be oval shaped, this step is not required.
Crop the Image
1. After setting up the Ellipse Select tool, Mark the Circle on the image. You can drag the circle from its centre if you want to adjust its position.
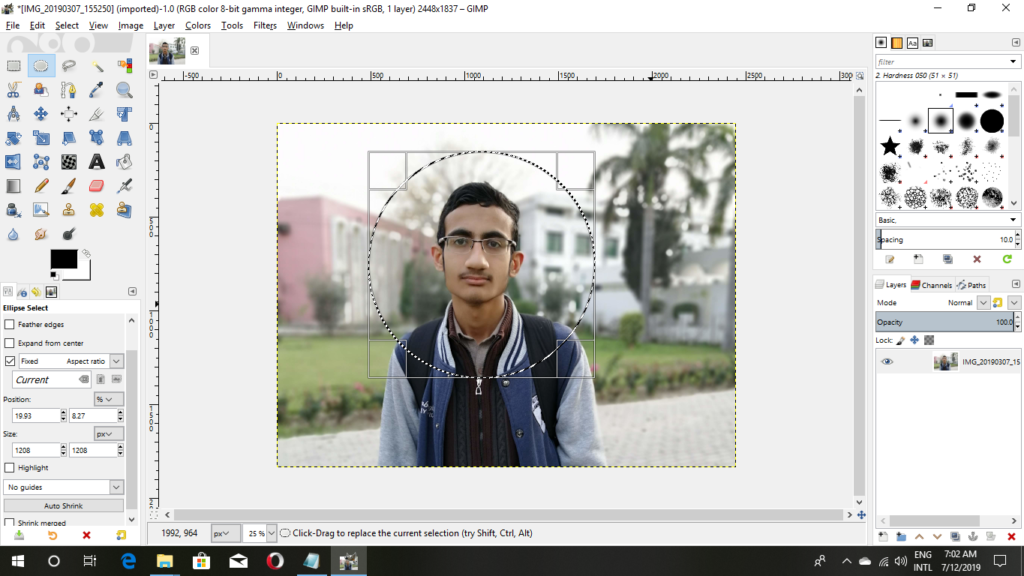
2. After marking the circle, use Select > Invert to select everything exept circle (Shortcut: Ctrl + I) and hit Delete.
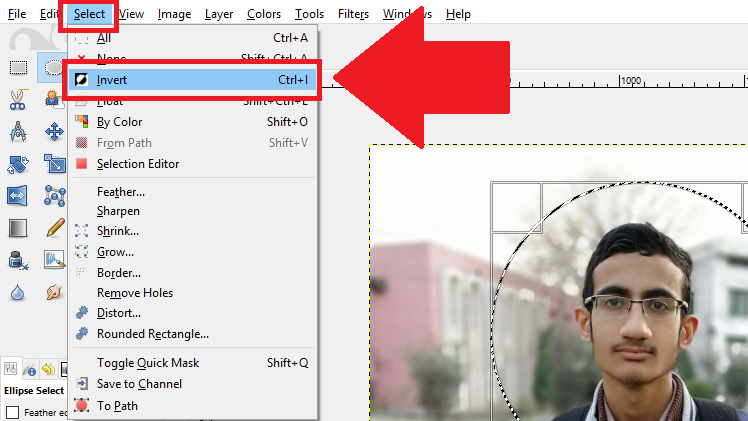
3. You will be left with a circle only.
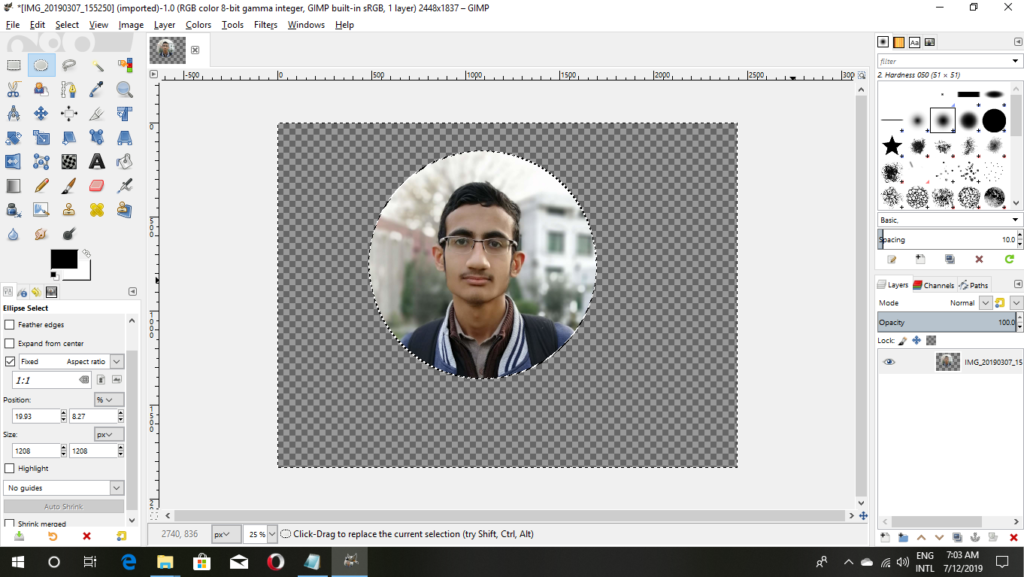
Cut the Excess Area
If there is an excess blank area in the screen, you can eliminate it by using Image > Crop to Content
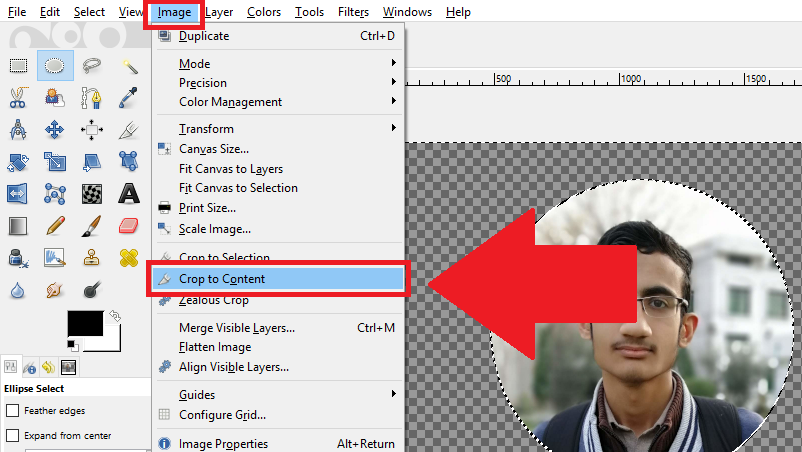
All excess blank area will be removed.
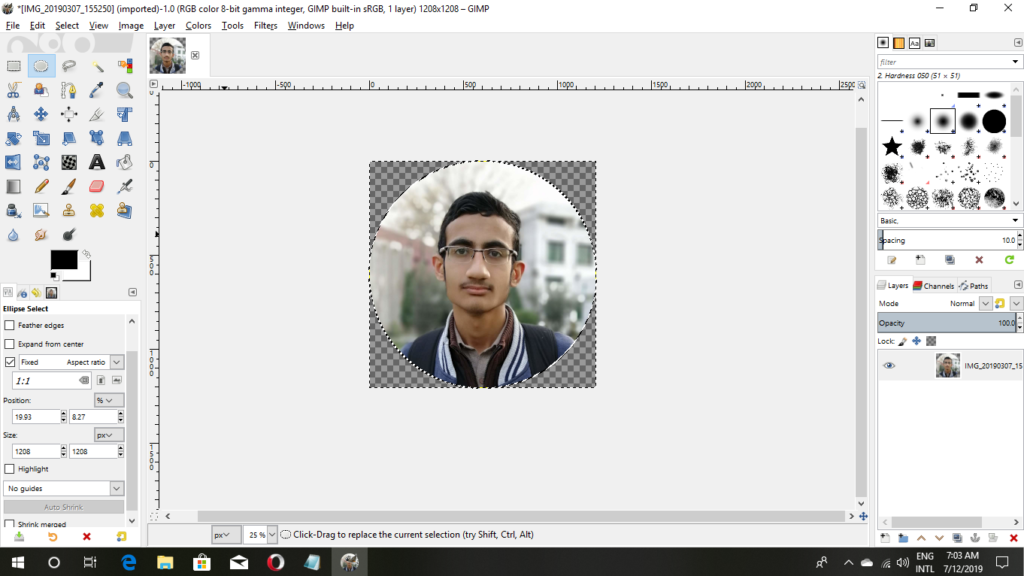
Export the Image
1. Click on File > Export As
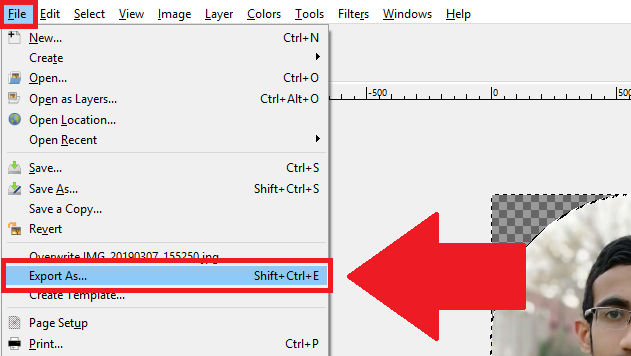
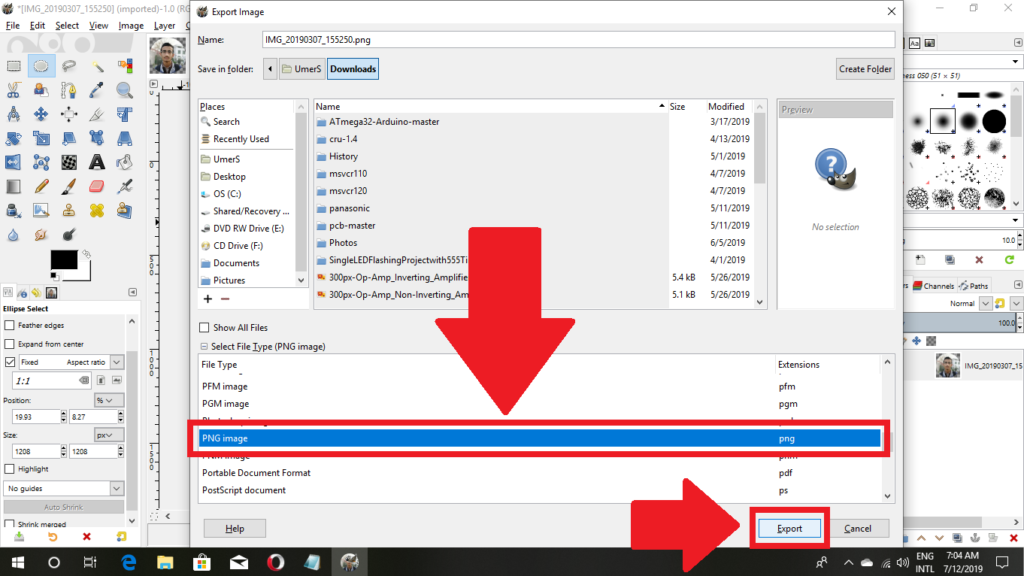
2. Set the path. Select png from the file type. It will ensure that you do not loose the transparency in your image. Hit Export.
You can also watch a video of me doing this step by step.
Hope you liked this post. Do not forget to share this with others.

