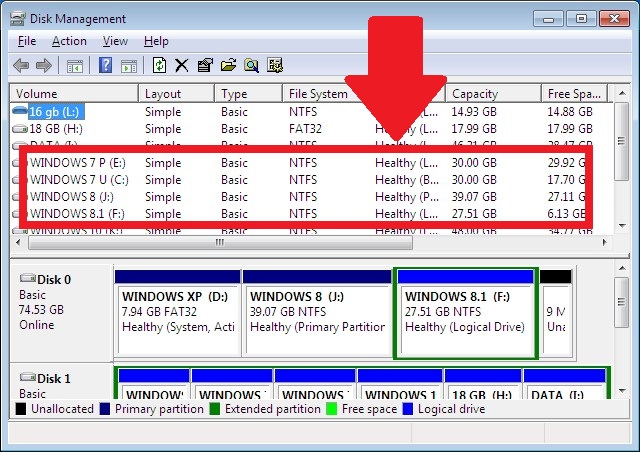
2. Click inside the upper box (See the screenshot beow).
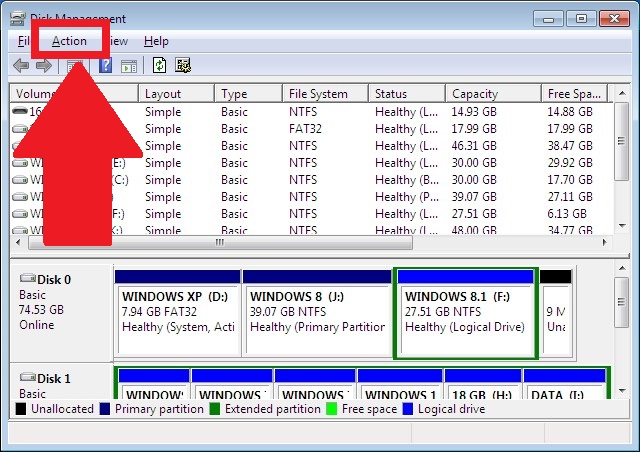
3. Click the Action menu.
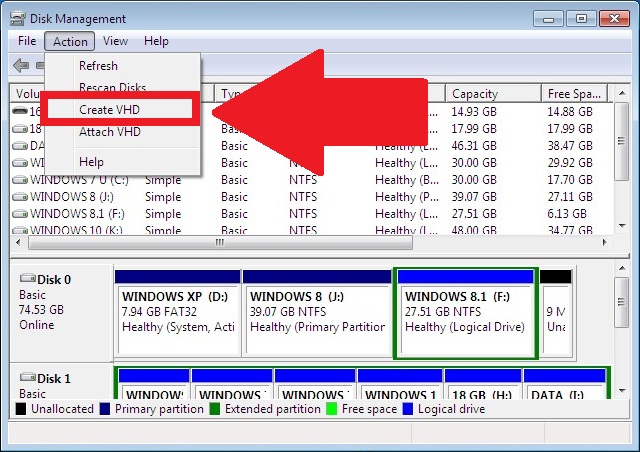
4. Select Create VHD.
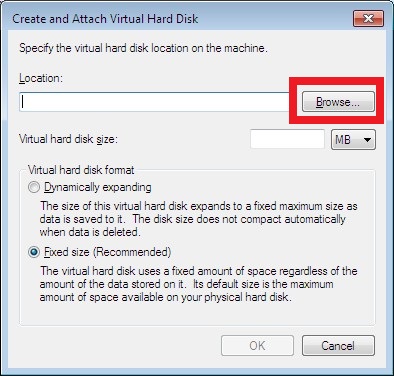
5. Click on browse
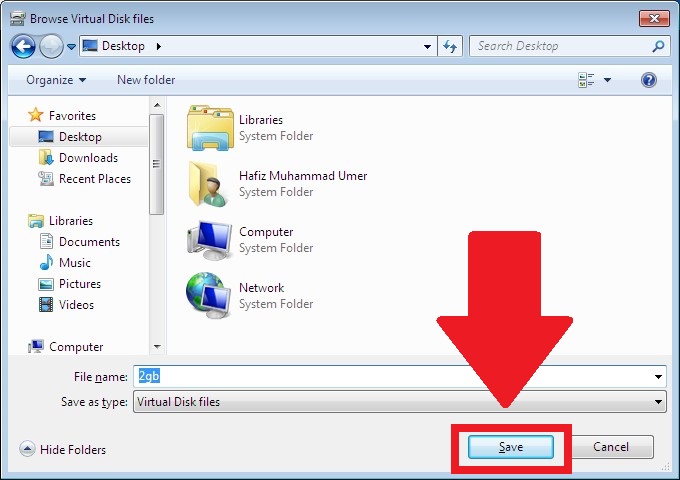
6. Navigate to the folder where you want to keep your virtual hard disk and type a name for your virtual hard disk file in the File name box. Then press the Save button.
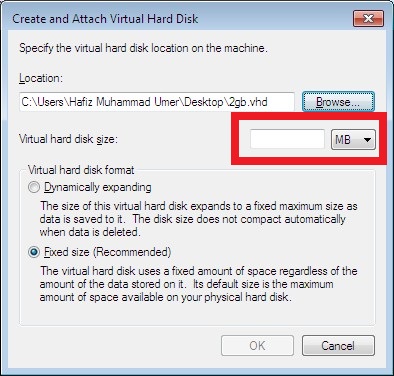
7. Now you have to select the size of your virtual hard disk. See the portion of the screenshot below I have highlighted by red box. To the right, there is a drop down menu which you will use to select units i.e. MB, GB or TB and in the left white box you have to type the value.
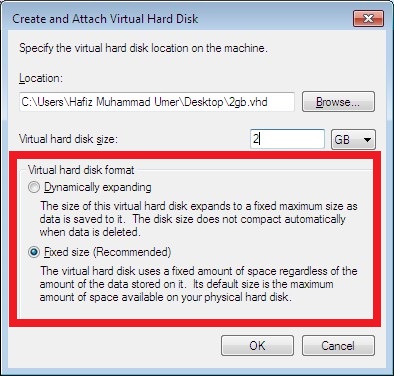
8. Now you have to select the virtual hard disk format. The Fixed size occupies all the space at once and Dynamically expanding will occupy space as you will put data into it. Also Fixed size takes more time to be created and Dynamically expanding takes less time. You can select either of these depending on your requirement.
9. After you have filled the required options, click Ok.

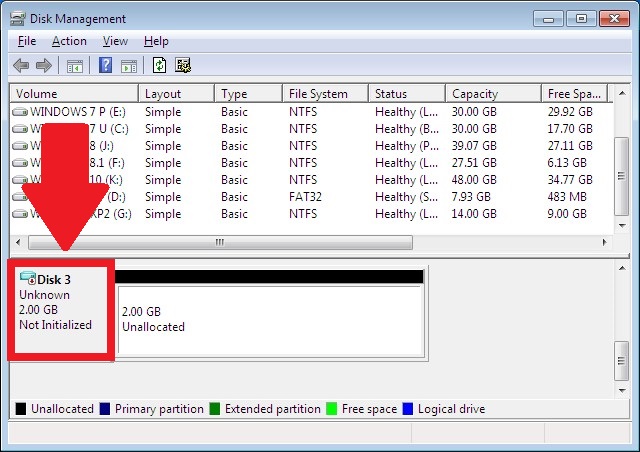
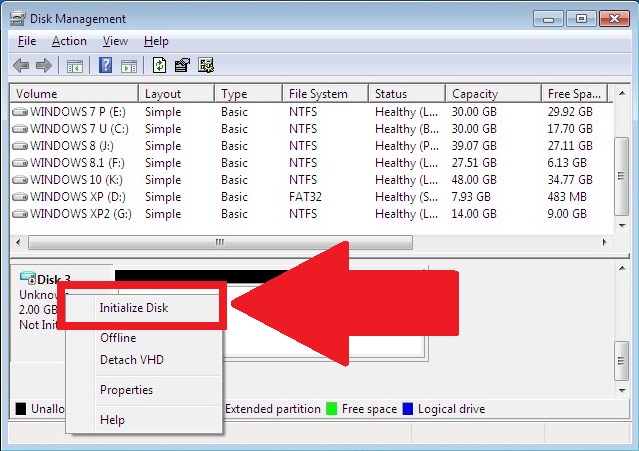
10. A new disk will be created. Right click it.
11. Select Initialize Disk
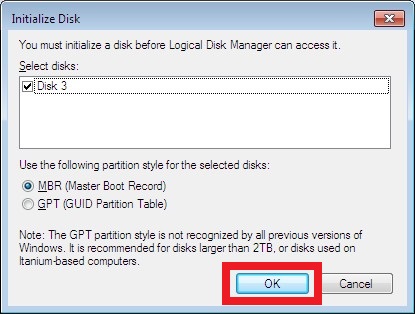
12. Now you have to select the style of your hard disk. You can select either MBR or GPT. The MBR is compatible with more versions of Windows. The GPT does not support very small sized hard disks. I have selected MBR. You can select either of these depending on your requirements. After selecting, click on Ok.
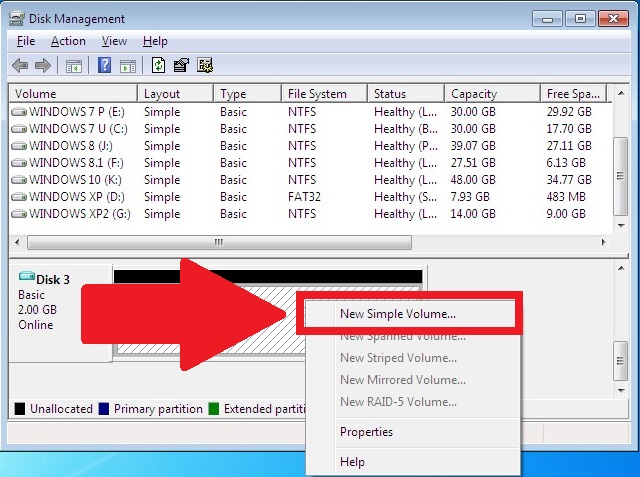
13. Now right click the whole unallocated space of your newly created hard disk.

14. Select New Simple Volume.
15. Click on Next
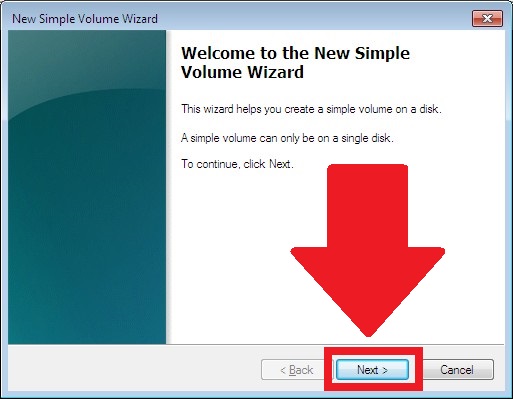
16. Again click Next.
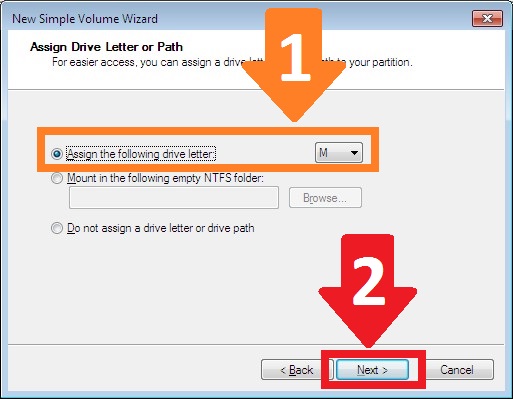
17. At this stage you will first have to select the drive letter (Shown by orange box) and then press Next.
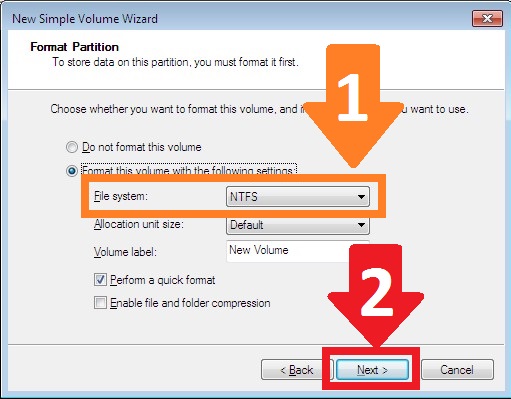
18. You can change the File system of the hard disk (shown by orange arrow) but this is optional. You can leave the default if you like. Then press Next.
19. In this window, you can review your selections and press Finish.

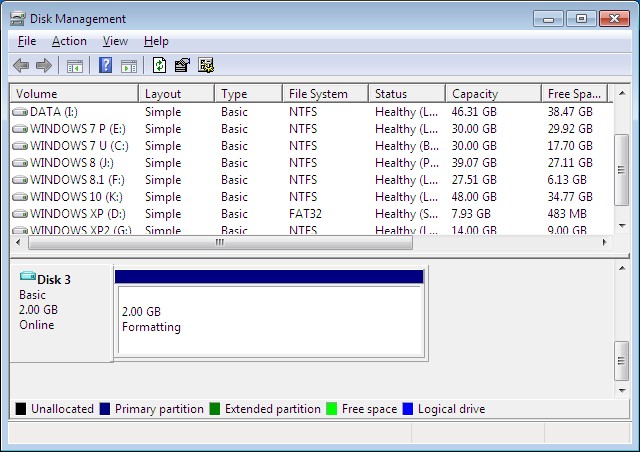
20. The hard disk will start formatting. It can take some time, so you will have to wait.
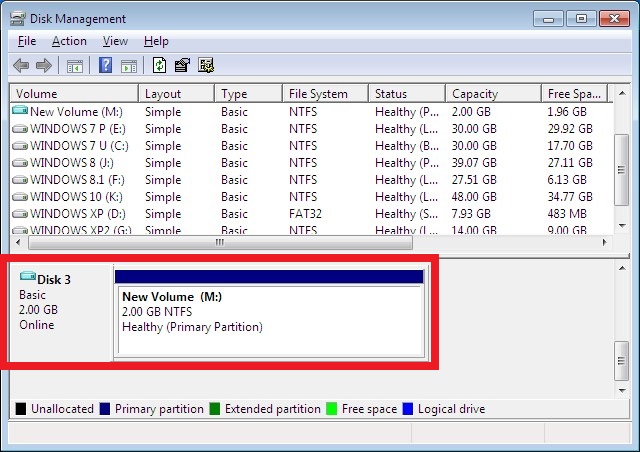
21. Now you can see your new virtual hard disk listed in the Disk Management.
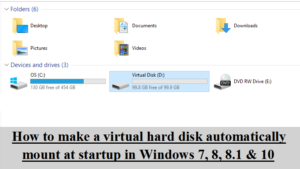
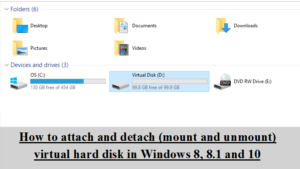
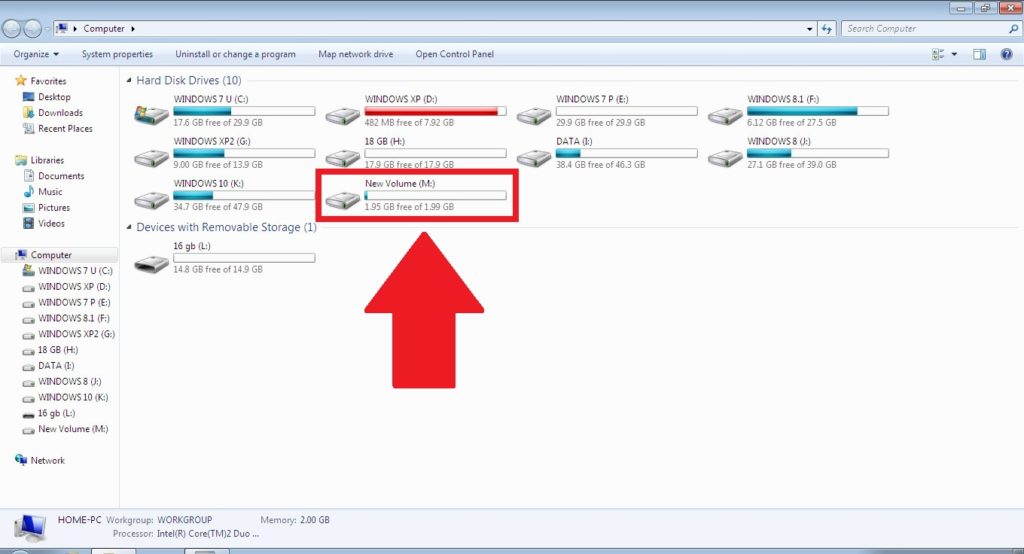
22. You can also open My Computer or This PC to confirm the presence of your virtual hard disk.
Share this post via Facebook _ Twitter _ Pinterest _ GooglePlus _ Email _ Blogger _ WhatsApp